
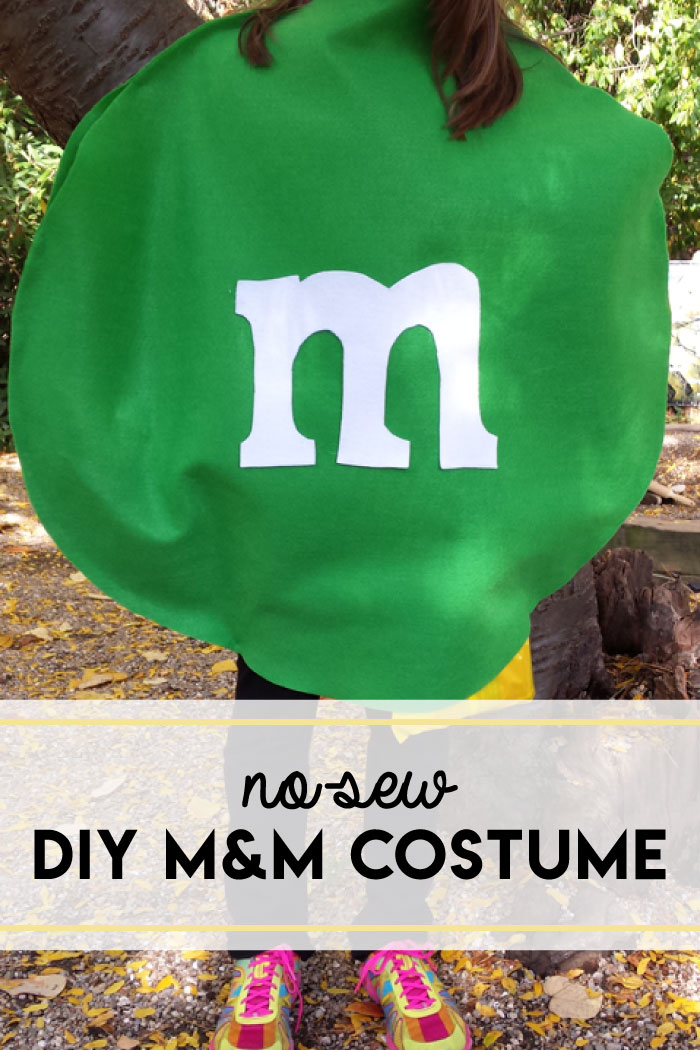
No-Sew DIY M & M Costume
I am pretty crafty, but I really love easy DIY projects. So many things are hard so why not go easy? So when Laurel decided she wanted to be an M&M, I thought, OK, surely I can make an M&M costume without needing to use a sewing machine. Because glue sticks are all of our best friends! I think this was the first time in craft history that I made up a project on the fly that turned out just as easy as I had hoped in my mind! And so I present you with this easy M&M costume DIY:
For supplies, you will need:
Craft paper
Two yards of felt (M & M color), for a max 36" diameter M & M
One 8.5 x 11 sheet of white felt
Fabric scissors
Glue gun + glue sticks
Pins
Batting (totally optional)
1. Make paper templates
For the M & M, I taped together two large sheets of craft paper (I have a big roll in my office) and had Laurel lie down so I could figure out a size that would have impact but not be overwhelming; for Laurel's 10-year old body this was about 32 inches. I measured out a circle old school style, by taping a string to two pens, holding one pen in the center, and tracing out the circle with the other pen. Then I cut out the circle. While I was doing this, Laurel freehand drew the "M" and cut out that paper template.
2. Cut fabric
With your M & M color felt folded in two, lay paper template on top and cut out circles. If you use a sharp pair of fabric scissors you'll have no problem cutting both pieces at the same time. Do the same for the "M" (lay paper template on top and cut out).
3. Pin glue zones
Pin areas shown be red marks in the below image to guide your glue zones. You want the head, arm, and leg holes to be big enough to get in and out of easily while being closed enough so the M & M holds it's circle shape.
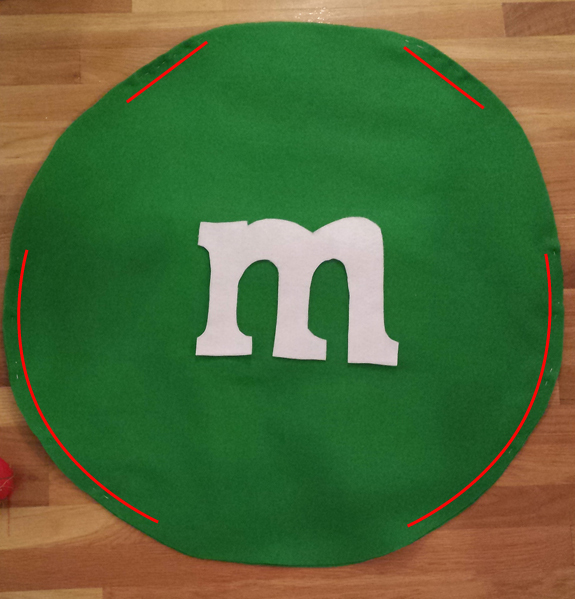
Easy M&M costume DIY
4. Glue pieces
Glue "M" to front of circle. Remove pins (I just in pins to mark the end of each zone to help guide me, then removed) and glue seams shut. Wait for glue to cool then test fit on your kid and glue openings a little more shut if necessary. Again, the more you can close the seams, the better the M & M will hold shape.
And you are DONE! This took about a half hour! I did buy batting thinking we might need to stuff the M & M, but we didn't need it. And no stuffing made the costume easier for Laurel to negotiate (and easier to fold up and put in my bag!). If you want, you can have your kid wear white pants, shirt, and gloves but we didn't have any of that. And it didn't matter -- based on the number of comments and excited squeals Laurel received at the zoo from other parents and kids, the costume clearly translated!
The only hitch with this costume (which Laurel and I discussed before starting) is that it's obviously not comfortable to have your arms sticking straight out the sides. So, she had her arms inside the costume, holding her treat bag, and she'd just reach a free hand to get a treat when it was time. If you want to avoid this problem, you could make a peanut M & M, which is a more oval shape. If Violet had been interested, it would have been cute to make her a peanut M & M companion for Laurel!
No-sew DIY M&M costume